Showing posts with label Altered book; Collage: Fortune & Geese. Show all posts

Friday, 23 January 2015

Adding the Midas touch: Ideas and inspiration for using gilding flakes and foil.

Hello hello.

The other day, in the final post of my 'Fortune & Geese Favour the Bold' series [a free, 7-part, altered book and collage adventure] I mentioned that I'd be rounding off the whole series with something optional ...
http://www.pinterest.com/notesonpaper/altered-book-adventure-fortune-geese-favour-the-bo/

... something that I personally used on my collage pages but which isn't especially necessary to add to yours. Unless of course you're totally into metallics, spangle, bling, glimmer and shine; in which case it's completely essential!!!

And that something is gilding / foiling.

And it's something I've seen cropping up in commercially produced crafting products more and more recently ... I might even stick my crafty neck out [you can gild it while it's sticking out there if you like!] and say gilding is going to be a continuing trend in 2015 ... so if you want to get in with gold crowd ... keep reading!  

Already this year Jennifer Grace has shared her experiences of the Heidi Swapp 'Minc' heat-foiling machine - watch her 'unboxing and first use' video here. And just today I've noticed the Becky Higgins Project Life 'Desktop Edition' features gold foiling too.
 
 But ... let me share with you how I've been using it in a slightly more messy, scrappy, patchy, distressed way:
There's certainly something to be said for and aggrandising your own work with a spot of gold occasionally. And whether or not it's gen-u-ine 22ct gold or not is neither here nor there! It's the thought - and the shine - that counts!

The idea to use gilding in my Fortune & Geese Favour the Bold project came from the spine of the book I altered:
So I thought I'd simply continue the theme inside the book too.

But before we go all-out Midas I just want to make a few things clear:
  1. None of the links in this post are sponsored by a company or retailer. The supplies I mention were sent to me for use in magazine projects while ago, and I've simply been using the leftovers in my own work.
  2. Whenever I work with / think about / catch sight of gilding flakes etc ... I can't help re-stating my awful Shakespearean wordplay about 'Rosencrantz and Gildingflakes' - and in this case 'Gildingfoil'. So ... there. I've said it again!! I can't help myself .. but at least we've got it out of the way early. [It's OK, no one but my sister ever laughs at that and even then she's probably just doing her sibling duty.]
OK then, let's start with Gildenstern gilding flakes ...

Gilding flakes:
Gilding flakes come in pots, in a variety of shades, not just gold, and can be used in combination with any of your existing rubber stamps:
  • Rather than stamping the design with ink you dab your stamp with the special glue that's sold alongside the flakes [available from brands such as Indigo Blu and Cosmic Shimmer] and then stamp the image as normal. [You must wash your stamp straight away though!];
  • You then pick up a few of the flakes and pat them over the glue-stamped area;
  • Next you use your finger tips and the recommended scrubbing sponge to remove the excess and suddenly your stamped design will be revealed in its golden glory!
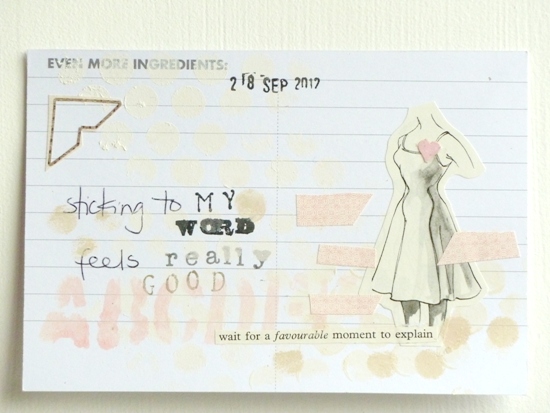
I found that this method tended to work best when I used stamps with a clear, bold, design; such as the heart shape [above] and the ampersand [below]:

 That said, it is possible to use them with smaller, more detailed designs such as these arrows:
 ... or these rings:

 
And really, the end result does depend on:
  • How sturdy the stamp is: I found that some of my more 'jelly' soft clear acrylic ones tended to 'squish' a little when pressed down ... AND ...
  • How much glue you used: too much will distorting the design while too little will mean the result is patchy. Appropriately enough the answer lies with Goldilocks: your glue needs to be 'just right'! 
Here's an example of the patchy effect .. although I actually don't mind its imperfections - it seems to sit happily with the laid back style of the pages: 
But, if you're not a stamper ... don't let that put you off using gilding flakes:
 
You can use the glue and the flakes without stamps; all it takes is a combination of flakes + glue ... and the glue can be applied to any surface in any way you fancy!
 
Take, for example, this card [made for my original Papercraft Inspirations magazine gilding 'Masterclass' last year] in which I used several different application techniques: 
The 'LOVE' sentiment was a stamp, using the method I described above, but here are a few alternatives:
  1. To gild the small wooden heart [top left] I simply used a sponge to dab glue all over it and added the flakes on top.
  2. The stripe down the edge was made by covering a strip of strong double-sided tape.
  3. For the die-cut cork heart I stencilled the glue through some sequin waste, removed the stencil, and gilded the design beneath [this is definitely something I'm going to try again with all of those masks and stencils I used to use with ink/paint].  
And if that's whetted your appetite for trying out some more 'freestyle' gilded designs then you're probably going to enjoy gilding foils ...

Gilding foil:
Unlike the flakes gilding foils come as a full sheet of gold [and other colours] but, similar to the flakes they are applied to a project using a specialist glue. 
 
In the case of the Tonertex range [which is the brand I have experience of] the glue is delivered via what they call the Write 'n' Rub foiling pen: 
What the pen design means is that you have the complete freedom to foil any design you fancy; you're not limited to which designs of stamp you have in your collection. If you can write, draw or scribble it [ideal for my scrappy-style pages] then you can foil it!

I'll admit that, occasionally, the pen did play tricks on me [glue coming out when I didn't want it to/not coming out when I did] but this may be due to how I'd stored it. And, to be fair, there are tips on how to avoid this on the pen itself plus there's a useful trouble-shooting page on the Tonertex website to deal with this. But that aside ... here's some ideas on how to put it to use ...
  • Once the glue is flowing you can do anything with it. This could be writing out a phrase or key word, drawing around a stencil or free-styling to highlight interesting areas on your page.
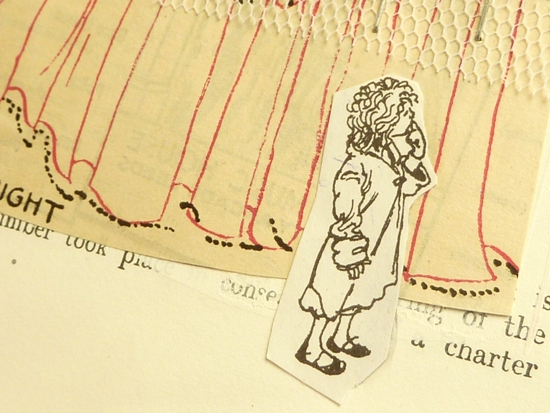
  • Here I traced around some cloud outlines on a vintage image:
  • Then leave it to dry when it will turn clear - this doesn't take long at all.
  • Next place the foil sheet over the dried glue and smooth it out with your fingers, pressing down to make sure the foil had made contact with all of the glued areas:
  • Peel off the foil sheet and that's all there is to it! You're golden [and so is your project!]
  • BTW the end result here is only patchy because that's how I wanted it:
Unlike using the gilding flakes [where you need to remove the glue from your stamps] this method of gilding doesn't involve any clean-up afterwards ... which is ideal if you're a lazy crafter like me!

And, because it was so quick and easy, I went on a small gilding spree ...
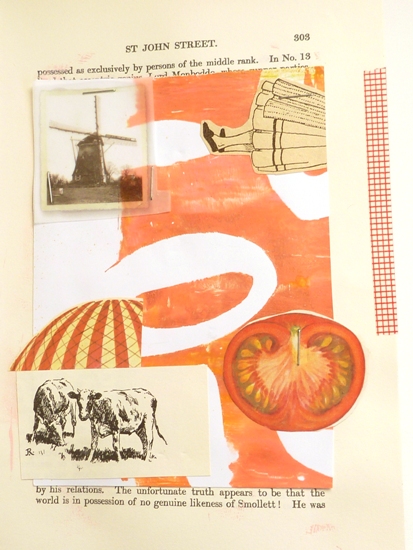
Here I used the gold lines to connect together elements from two separate images:
 And here to spruce up the stripe on these trousers:
 And I realised that if I didn't make the pen flow fully I could achieve a nice, scratchy effect:
And, finally, for both this post and my 'Fortune & Geese Favour the Bold' project ... I also used the Write 'n' Rub pen to gild my book cover:
I simply ran the pen around the indent which bordered my cover and pressed the foil sheet down into it ... and the end results were pretty close to the original gilding on the spine!
 And there we have it:
http://www.pinterest.com/notesonpaper/altered-book-adventure-fortune-geese-favour-the-bo/
 ------------------------------------------------------------------
 
So, that's my very own book project ... how about yours?
  • Are you plotting to try out any of the ideas in the series?
  • Are you tempted to seek out some new gilding or foiling products OR, better still ...
  • are you tempted to dive into your existing crafty stash to unearth some you already have but haven't used in a while?
As always, you're welcome to send me links to your projects or simply leave a comment here or over on my Facebook page [whichever's easiest] with your ponderings on gilding and foiling.

Seriously ... how could you resist joining in what could be one of the most vital conversations of 2015??!

Julie ;-)

Tuesday, 20 January 2015

Adding words to your pages. Part 7 of the collage adventure 'Fortune & Geese Favour the Bold'

Hello hello.

It seems like [and quite possibly is] an eon since I began this altered book + collage adventure but let's keep moving forward towards our final destination: the finished book!

There's one more optional extra I plan to share later but, as it's not a vital part of making and completing an altered book or a collage, today's post really will round-off the main content of the series.
http://www.pinterest.com/notesonpaper/altered-book-adventure-fortune-geese-favour-the-bo/

I'd like to think that, while it may have taken me a few months to share everything I wanted to share, this can now become a self-contained series of posts for anyone to dip back into either as a full series, a free creative workshop from start to finish or as one-off bite-size inspiration hit at any time in the future. And here's how the full journey unfolds:
  • Part 1: Prep notes and supplies list
  • Part 2: Introducing a themed focus into your altered book / journal
  • Part 3: Turning an old book into a new home for your collage
  • Part 4: 101 alternative crafty supplies ... and where to find them
  • Part 5: Using figures to create a narrative in your collage
  • Part 6: Experimenting with Abstract collage (while playing with your favourite papers)
  • Part 7: [you are here!] Adding words to your pages.

  • And if you've been occasionally joining in the adventure - picking up tips and ideas from along the way - do let me know, it'll be great to see your interpretations. [For example, here's how Alexa at Trimming the Sails recently used the altered book she created to house her December 2014 journal].

    Now let's venture on to the final leg of our journey ...

    Today's examples and ponderings relate to adding words to a collage. Some people might refer to this as adding 'journaling' but if that all feels too grand or too personal ... then 'words' does the job just as well!

    Of course, there's absolutely no reason you need to add words on your pages at all; collage can be, and often is, purely about the images and colours involved. But, for the purposes of this particular project, [my 'Fortune and Geese Favour the Bold' / Learn Something New Everyday journal] I added wording using two different methods:
    1. Longer-form handwritten journaling hidden away in envelopes. And
    2. A shorter typed summary / title.
    Let's take look at both of those first before moving on to various other examples of methods I've used in the past:

    1. Longer-form handwritten journaling hidden away in envelopes.
    http://www.pinterest.com/notesonpaper/altered-book-adventure-fortune-geese-favour-the-bo/
    After reflecting on what 'lesson' I'd learned each day, jotting down notes and ideas throughout the week, I then wrote out longer explanations detailing the story behind them to put things into context. These I wrote out, by hand, into a notebook then tore out the pages and popped them inside the envelopes I'd added to each double-spread page of my book.

    I chose to hide my journaling away more for aesthetic reasons than ones of privacy ... although privacy was a consideration when I knew I'd be sharing my pages online. But really I chose to keep the wording separate mainly as it meant I wouldn't have to write all over the collage I created.

    Writing across the page seems to work better on art-journal pages, where you might have intentionally left room to add in your journaling later, but I wanted the main focus of these pages to remain fairly abstract and more about colour and form rather than spelling out things literally. However ...

    ... as I'm a dyed-in-the-wool word lover I haven't yet weaned myself from using at least a few words on a page! Which is where the next method comes in ...

    2. A shorter typed summary / title.
    The short, pithy, lessons you're encouraged to recognise and document through the 'Learn something New Everyday' project [hosted at shimelle.com] can be nicely presented in this typed format.

    Day 12: It's nice to be reminded that there are people who 'get' me:
    The size of the typed font keeps the phrase small and compact meaning it doesn't take over your entire page; it can easily be slotted in amongst the other collage elements:

    And yet these few lines can remain detailed enough to give a distinct flavour of both the day in which you experienced it and also the theme of the elements on the page. Plus, if you're using an altered book - where you've painted over some, but not all of the text - adding in some additional typing can really reflect the original nature of the book pages.

    Also ... you can't beat the look of typing for adding a nostalgic, slightly edgy, arty kind of style to your altered book especially if your keyboard / typewriter ribbon is as unreliable, imperfect and eccentric as mine! [What's that they say about bad workmen? ... ]:
    You could also use typing to add:
    • a title
    • a list
    • a quotation
    • lyrics

    If you don't have a typewriter you can, of course, write your journaling in a typewriter style of font and print it out but I prefer my typewriter for 2 main reasons:
    1. The first is that it's more immediate, I can have the whole phrase typed out before my laptop's even warmed up ...
    2. and secondly, I can easily type directly on to scraps of old paper, which I love to do:
    In fact, I like it so much ... whenever I cut up an old book [which is fairly often for my shop products!] to use its images or text I save up the blank inside pages and off-cuts to type on later!
     
    Oh yes I do ...
    Who just said 'can't she throw anything away?' ... [BTW: the answer to that - when it comes to papery goodness - is 'No!']
     
    If you're debating with yourself over whether or not to buy a typewriter then this post I wrote last year might help ... I say *might* ... 
    5 things laptop user should take into account when thinking about buying a *typewriter*. [All the stuff you won't (a) find in a manual and (b) to be honest, might not really need to know ...]
    3. Using snippets of words:
    I've written lots more about using snippets of words, cut from old book pages here [complete with examples of my 'Snipped Tales'], and also here.

    However ... this is a page before I added any additional typed journaling but, while I was putting it together a few key words leapt out at me:
    The 'lesson' I was documenting that day related to watching Game of Thrones and the phrases I came across in amongst my collagey bits just seemed to fit! ["The Old Gods and the New"?? Get it?? ...]

    So remember to keep your eyes, and your mind, open when sifting through old book pages etc as a few, well chosen words, can say plenty! You certainly don't need to write out any particular full sentence to take advantage of some nice old fonts on your page.

    For more examples of how to add wording/meaning/context to your projects allow me to take you on a minor detour away from my 'Fortune and Geese Favour the Bold' altered book and on to some alternative routes ...

    Examples from other projects:

    4. Typing in a junk journal:
    All of the journaling in my May 2014 junk journal was typed:
    Again, it's a really useful method of getting lots of details down in a small space, plus ... you can write it all out directly on to various interesting layers [eg. tags, envelopes, tickets, old paper etc].

    Or how about another method that lets you add wording wherever you want it?

    5. Stamping:
    Small alphabet stamps are one of the most useful things you can have in your basic crafty stash! While pre-made commercial sentiment stamps are all well and good ... you can't always expect to find the exact phrase you want! ;-)

    Case in point:
    So yes ... small alpha stamps are a great way to add your own words quickly wherever you want them.

    For these examples, for my 'Learn Something New Everyday' project 2013 I used a roller style of alphabet stamp and a black ink-pad. It's not always a perfect method [although that could be just me! There I go blaming my tools again!] but personally I don't mind the imperfections ... they seem to fit in just fine with my messy, disjointed scrappy collage style:
    [There are lots more links to examples of  my previous collage work on my Pinterest board].
     
    And finally ... how about a mix of styles on one page?
    Back in 2012 my 'Learn Something New Everyday' pages featured a combination of: handwriting, stamped words - using different fonts - and snippets of words cut from books which supported the overall theme:
     
    Well ... with those wordy options we seem to have reached the end of our collage adventure which is appropriate for me really as I still can't consider a page 'finished' until it displays at least one or two words!
     
    I hope it's offered you some alternatives and inspiration to try next time you want to add any kind of journaling, detail, title to your creative journal pages, collage, scrapbook layouts and even tags and cards.
     
    As I've said, I have an extra post still to share but that's just some sparkly eye-candy to enjoy while you catch your breath after the journey! 
     
    
    Here, again, are all the previous posts for easy access: 
  • Part 1: Prep notes and supplies list
  • Part 2: Introducing a themed focus into your altered book / journal
  • Part 3: Turning an old book into a new home for your collage
  • Part 4: 101 alternative crafty supplies ... and where to find them
  • Part 5: Using figures to create a narrative in your collage
  • Part 6: Experimenting with Abstract collage (while playing with your favourite papers)
  • Part 7: [you are here!] Adding words to your pages.

  • Better still ... why not Pin this page to one of your Pinterest boards for future reference?

    ---------------------------------------------
     
    I do hope you've picked up a few ideas. or even a little pocket of collage confidence, somewhere along the path of our 'Fortune & Geese Favour the Bold' journey; it's really what the series was intended for. [Well, that and having an opportunity to share and chat about lovely paper!]
     
    Don't forget to get in touch with any of your projects whenever you begin your own altered book and collage journey, and feel free to share any of your steps along the way.
     
    As always ... thanks for keeping me company on our creative trip ... now I'll have to have a think about where we go to next!
     
    Julie
     
    ---------------------------------------------
    And, if you fancy some collage-supply inspiration then look no further than:
    ... the packs of 'Collage Scraps' you can grab from my shop:
    https://www.etsy.com/uk/listing/209715534/collage-scraps-lucky-dip-pack-of?ref=shop_home_feat_2
    They're absolutely the kind of supplies I use in my own work [naturally ... as they some from my personal book collection and my work desk!] so if the style I've been sharing during this series is something you currently work in, or would like to try out, then these are perfect bundles of fresh scrappy intrigue for you!

    Likewise the good old 'Serendipity Packs' which contain all kinds of snippets and images form old books.

    Or there's the new[ish] 'Fabulous Figures':
    Which are ideal if you like to incorporate people / bodies / characters into your work.
     

    Friday, 12 December 2014

    Experimenting with abstract collage [while playing with your favourite papers!]: Part 6 of the collage adventure 'Fortune & Geese Favour the Bold'

    Me again. Hi.

    As this is really the second half of our discussion about filling up those altered book pages [the first half is here] how about we dispense with introductions and dive straight back in between those book leaves?
    http://www.pinterest.com/notesonpaper/altered-book-adventure-fortune-geese-favour-the-bo/
    These were the collage styles I identified from my own book:
    1. The figurative or narrative aspect of the page. These are the parts of it which feature a figure / a character / a clear theme which a viewer could connect with; it's the parts which tell some sort of story or which at the very least a viewer will attempt to interpret into a 'meaning'.
    2. A more abstract form which is more concerned about creating a general mood rather than a specific 'meaning'. And also a form which simply celebrates and puts centre-stage your favourite scraps of paper. [Because it is possible to have favourite scraps of paper isn't it? We've all been there ...].
    So let's leap straight to part 2 ...

    2. Experimenting with abstract forms, layering and colour to create a general mood.
    What? No, hang on ... if this all sounds a bit too 'arty' for you, a bit too highfalutin, pretentious or not something you feel that you should be dabbling in ... then let me stop you right there!!

    For one thing ... there's nothing wrong with indulging your inner pretentious artiste occasionally, just stop worrying, get your smock and beret on, and just enjoy the moment why don't you?
    And for another thing ... but don't tell anyone this part OK? OK. For another thing this method really boils down to doing nothing fancier than chopping up bits of paper, rearranging the snippets, and gluing them back down again. Seriously; so don't discount it just yet.

    And, do you know what? As basic as that method might sound at first it can actually lead you to produce pages which are not only aesthetically pleasing to others, but which are also extremely satisfying to construct too!

    Chopping up, rearranging and gluing is effectively all that really happened here:
    And, far from feeling basic, childlike or too simple to bother with ... I find this style of working really enjoyable, freeing and inspiring. Let me explain why ...

    Using your favourites & killing your darlings:  
    Throughout this series we've been discussing having a PURPOSE in mind when sitting down to being a project like this and, in the previous post, I talked about how using figures in your collage can help if your purpose was to tell a story, to document an emotion or to pin down a feeling and so on.

    Yet, equally, your purpose may be nothing more than to spend time playing with beautiful papers and creatively arranging some of your favourite supplies.

    That's really all it need be; enjoying the materials you're using and seeing how you can show them off on the page.

    And here's where I believe that, as you're focussing solely on the loveliness of the materials in front of you, you might as well use your favourite of favourite supplies. Like how a chef can make a really simple dish taste delicious by using only the best of ingredients!
    • Just because this style might use lots of small scraps and snippets it's not the same thing as saying you should be using the old papers in the back of the cupboard which you don't like! No!
    • Use up all those scraps which you've saved, cosseted, protected, called 'Best' and stroked like a lover's hair. [Don't lie to me ... we all have scraps we love a little too much ... ].
    • This is the time to use your favourites, your 'one-day-I'll-find-the-perfect-project-for-that' items. Why not make your next project that project!
    • And don't worry about using lots of them in one project because when you keep them all together in one book [like the altered book I've used to house all these collages] then all those precious scraps will take on an accumulative power.
    • They'll build into something with impact rather than have then spread thinly across lots of different projects where their effect will be diluted.
    • Many of the papers I used in this project were gorgeous bookbinding off-cuts gifted to me by a lovely friend, and although I initially thought they were that ridiculous thing of being 'too nice to use' ... I came round to the idea that I'd really be serving them better if I turned them into a nice project I'd be proud of!
    Plus, cutting into those favourite of items can be good therapy: it's a great cure for preciousness!

    A lecturer on my English degree once repeated the old writers' phrase that says to do the work justice sometimes you need to "kill your darlings" when you're writing. Meaning you shouldn't get overly precious about any of your personal favourite lines in the text. Sometimes the text as a whole might benefit from you editing that line ... or getting rid of it altogether, no matter how much you think it's perfect!

    Which is something I try to keep in mind while convincing myself to take the scissors to a 'best' piece of paper: let go of the favouritism, don't waste time trying to protect your 'darling' just cut it up and make something better from it!!

    OK then, now that we've manoeuvred your darlings over to the chopping block ... what are you going to do with the bits you slice off?

    [Wow ... this collage-adventure has taken an unexpectedly dark turn hasn't it?].

    Combining simple abstract scraps + snippets.
    Some of those scraps, strips and images you've collected can be combined on a page purely to look good; they don't need to 'mean' anything or refer to any theme or overall story at all.

    Take this page for example, the journaling at the bottom refers back to something I'd thought about after watching a film ... but the items on the page don't necessarily reflect that.  For a start ... the film wasn't about a flying coconut:
    Instead I chose the individual items as they worked together.
    • The shape of the coconut balances with the ovals on the gelli-plate printed paper;
    • which matches the colours in the old stamp
    • and the thin strips of paper along the bottom / side simply mirror the colours used elsewhere on the page.
    It doesn't all 'mean' something; but together it works - think of it this way ...

    Have you ever heard a song and, because it was so catchy, or feel-good, or it gives you goose-bumps or whatever, and you just fell for it? No questions asked. It just gets to you.

    And then, one day, you actually make a point of really listening to the words ... and you realise ... it doesn't make any sense! You just can't fathom the meaning. Or else the lyrics don't say anything at all! And yet ... the overall effect, the finished piece, still somehow works.

    [Case in point:  'I drew a line, I drew a line for you. Oh what a thing to do. And it was all yellow' from Coldplay's Yellow. I love the song; I've never been able to work out what it means - Why's everything yellow? And why does it sound like it must mean something deep and moving ... yet it was just yellow? But I don't care: I like the overall effect!]

    Well, that's how I think of this style of collage. You just play around with materials until it just feels 'right'.

    There are no rules to abide by but here are a few ideas to guide you when you're combining these abstract shapes to create a mood with no particular meaning!

    1.Colour:
    • Look for interesting combinations of colour, texture, print, surface pattern.
    • If you've chosen a colour palette for your altered book, then that will narrow down your focus and you can experiment with just those shades and prints which fit the theme. 
    Example: The key to pulling this page together was finding more than one scrap of red, and more than one scrap of green to create some balance and harmony between the quite random elements:
    2.Materials:
    • Try mixing old and new supplies to create contrasts of fresh modern prints and old images and treasures!
    Example: The page contains: scraps of fairly recent scrapbooking paper; a snippet from a vintage children's book and a vintage encyclopaedia page about semaphore - both of which I had indeed been saving for one of those 'special' projects!
    Example: Here I combined a paper I made at a gelli-plate printing class [with Kate Crane] with a bright pink tractor illustration from a 1960s children's' encyclopaedia:
    3. Composition:
    • In your composition think about using a mix of harmonies [where things flow, line up, match, coordinate] and tensions [where something might overlap, float off on its own, hang over an edge, look awkward or out of place ... for me .. this is where the magic happens!]
    Example: Here I overlapped several layers and didn't line up any of the edges. Then I stapled that tiny little scrap on the right 'just because'!
    Example: As I had 30 collages to make to fill the book I was trying to push myself to change things up a little occasionally - so this page [below] was me trying something new with my composition! I arranged the elements in the four corners of the page, which I don't thing I've tried before:
    It's a bit odd, and even I'm not entirely sure what story I had in mind when I was making it [I don't think it was to do with a windmill, a cow, and a tomato though ... I'd have remembered that.] ... but, to maintain some sort of harmony while experimenting with the form ... I worked with a simple and harmonious colour scheme.

    Finally for today ...

    4.Attitude:
    As you can probably tell by now:
    • this style is very loose and free ...
    • and it's full of wonky lines and higgledy-piggledy edges!  
    • and these collages have never been near a cutting mat, a ruler or paper trimmer ... everything is just hacked into with big scissors or torn to size!
    • then it's glued down with any old glue ...
    • using a plastic glue-spreader as I never want to clean out a brush. So there.
    If you're a perfectionist this will either set you free ... or make you ill. I can't anticipate which ... you know your proclivities better than I!

    But, if you're someone without such exacting standards, someone who can bear to be parted from straight lines, symmetry and measuring ... someone who just wants to give something new a try ... then go for it!

    Example: Here's part of the negative / outer surround of a shape I'd die-cut with my Bigshot ...
    And I used it because no leftover or scrap is safe no matter how uneven or odd! And it helped to make what became one of my favourite pages in the book:

    -----------------------------------

    So, what can you take away from today's collage adventure?

    How about ...
    • If your pages don't have a particular purpose as such, if they're not meant to tell a particular tale ... then just allow the process of playing with paper to be your purpose.
    • Just cut, rearrange and stick down for its own sake. To relax, to practise your craft, to feel creative, to nurture yourself ... to avoid housework. [Find me a better reason!]
    • Treat it like a meditation. Only ... treat it like a meditation you do with your eyes open. Because you'll have scissors in your hands. And using them with your eyes shut is just asking for trouble and probably won't relax you at all.
    • And use your favourite supplies and scraps!
    • Treat those papers less like hoarded treasures locked in a vault and more like seasonal vegetables. Use them while they're at their best, while you love them ... before they go off! Or rather ... before you go off them!
    • And when you're shuffling them around the page have fun experiment with the composition. Most of the time just go with your gut instinct, trust your own eye and make what looks good to you. Then, occasionally, push yourself a little and try something new, something which at first you think won't work. And glue it down!!
    • If you hate it - no problem - nothing's going to go to waste.. Just chop up the entire page and re-use the scraps!
    • But equally ... you might just stumble across your new favourite way of working!
    If you're enjoying the collage journey please do consider:
    • leaving a comment to let me know
    • sharing any work you make based on an idea you picked up en route
    • pinning one of my pages to Pinterest
    • or sharing a link to the series via your 'go to' social media.
    I love offering tips and ideas here on my blog ... but it's even better to know when they've made their way to someone who finds them worthwhile!

    Julie :-)

     -----------------------------------

    'Fortune & Geese Favour the Bold' is an altered book and collage adventure which you can catch up on [for free] in the following posts:
  • Part 1: Prep notes and supplies list
  • Part 2: Introducing a themed focus into your altered book / journal
  • Part 3: Turning an old book into a new home for your collage
  • Part 4: 101 alternative crafty supplies ... and where to find them
  • Part 5: Using figures to create a narrative in your collage

  • Wednesday, 10 December 2014

    Using figures to create a narrative in your collage : 'Fortune & Geese Favour the Bold' Part 5


    Hello.

    If you followed my tutorial for creating an altered book earlier in the series I do hope it's not been sitting empty waiting for this follow-up instalment! But, just in case, let's get started filling up those pages ...
    http://www.pinterest.com/notesonpaper/altered-book-adventure-fortune-geese-favour-the-bo/

    The 'Fortune & Geese Favour the Bold' collage adventure itinerary ... so far:
  • Part 1: Prep notes and supplies list 
  • Part 2: Introducing a themed focus into your altered book / journal [looking at having a theme and a purpose before you begin]
  • Part 3: Turning an old book into a new home for your collage [a step-by-step tutorial]
  • Part 4: 101 alternative crafty supplies ... and where to find them [after reading this don't tell me you don't have any collage supplies!]

  • So far in this 'collage and altered book adventure' we've really been looking at how to prepare before you begin. [See the links above]. And now today, and in the next post, we're going to look at a way of filling those pages.

    Disclaimer:: Like I always say: this is just my way of doing things; I don't anticipate you'll get to the bottom of this post and turn into a Julie-clone ... [although, if that does somehow happen ... do let me know ... I might be up for some sort of scientific / technological innovation prize!]

    Well, I say it's just my way of doing things when, more specifically, this is was my way of making this particular book. Therefore my purpose for this set of posts is really to just:
    • share some ideas about playing with paper;
    • think out loud;
    • explain my methods complete with lots of example pages;
    • and to encourage you to think about how the images you choose can help you tell a visual story.
    Many of the collages in this book consist of two key elements which I held in mind while constructing each page:
    1. The figurative or narrative aspect of the page. These are the parts of it which feature a figure / a character / a clear theme which a viewer could connect with; it's the parts which tell some sort of story or which at the very least a viewer will attempt to interpret into a 'meaning'.
    2. A more abstract form which is more concerned about creating a general mood rather than a specific 'meaning'. And also a form which simply celebrates and outs centre-stage your favourite scraps of paper. [Because it is possible to have favourite scraps of paper isn't it? We've all been there ...].
    And, in the spirit of my 'Freezer Meals Approach' to blogging [make in bulk but savour one at a time] we'll look at both of these individually turn.  So, for today, let's just focus on the figurative and narrative elements.

    1. Using figurative or narrative elements on your pages.
    If you're on the look out for a cast of characters of your own to use in your collage / art journals / crafting than check out my Fabulous Figures [please note: that's a product promotion ... and not a come on] which are lucky-dip packs of mixed figures and characters ready to feature in your next artistic story!
    https://www.etsy.com/uk/listing/214651494/fabulous-figures-are-lucky-dip-packs-of?ref=shop_home_active_1
    Now let's reflect back upon the PURPOSE of the book you're creating, the collage you're making, journal you're filling etc ...

    ... because it may well be that you're using your creative time to reflect something about your life, to tell a story, express an emotion, capture a moment and so on.

    In which case, using figures can be a direct way to transfer those feelings from your head to the page.

    Take a look at this figure and see if you can guess the feeling I was trying to convey when I chose to use this particular character over any number of other options:
    What do you think? Thoughtful? Uncertain? Pondering? Wondering?

    Well, the page documents a day where I had to make a work-related decision and simply couldn't do it on the spot over the phone; so my boss gave me overnight to think on it. And, as the journaling on the page explains ...
    I was afraid to say both 'yes' and 'no' ... hence selecting the little character who, like me, looked confused and deep in thought!

    Similarly I supported the theme by using the arrow illustration - to indicate having to choose a direction - and I also added a small figure in the top left corner who's wandering off in the completely opposite direction to the figure at the bottom!

    Now ... chances are you didn't pick up on all of that on first viewing but that's fine; but the fact that I had thought all that through while I was making it definitely helped me decide what to put on the page.

    With all the scraps of paper and images at my disposal .... having a clear narrative in mind helped me narrow down those options and pull together a cohesive page. 

    Same goes for this one:
    No one outside of my own head would know that this page is about me remembering that every year I've joined in with Shimelle's 'Learn Something New Every day' project I've documented a lazy September Saturday spent with James. So this page features a couple of figures to represent the pair of us and a tortoise to represent our relaxed Saturday-night-in-front-of-the-TV-with-wine feeling!
     
    As for the 'St.Ives' card ... that doesn't really mean anything! It was simply one of the supplies I'd sorted out to use before I began my pages and it fitted in with the colours of the page. The nearest it gets to contributing to the theme is that we've been there ... and it was nice and relaxed too!
     
    
    But your pages don't always need to be as subtly themed as those pages of mine which need to be unpicked and explained to a viewer. 

    You may want to be quite literal in your approach by creating a page which is clearly 'about' something ... and you use that 'something' to illustrate.

    Take the following for example ...

    Remember how all the collages in this book where all relating to my 'Learn Something New Every day' lessons during September? Well on this particular day I was reflecting on how I 'd been walking home when I spotted that my neighbour's gate was open. My neighbour who has 3 huge dogs!

    And I didn't know if the dogs were out in the street. And I panicked ... and didn't know whether to just turn around in the street and go somewhere, anywhere, else instead!!

    In the end I did reach home in one piece ... and eventually this page came out of the experience:
    [For the record: next door's dogs are a lot bigger than the one on my page! Even I would've managed to get past one of those!].

    So yes, it was a page about dogs and I used a dog to illustrate that fact. Nothing clever or obscure about that! 

    But that's one of the best reasons to use a figure on a page - to act as a readable and recognisable focal point which can quickly communicate the story you're trying to tell.

    Here's another ...

    The journaling here is about how you don't always need great big hugs to show someone you care. You can reach out and touch their fingertip ... and they'll still get the idea.

    And what did I use to express this thought? An illustration of a finger tip of course:
    And there's more hands in this close-up where the narrative was about being busy with work, and the image reflects the thought:  
    When I began this post I didn't realise there would be a hands/canine theme happening .. but here's another dog:
    ... whose pleading look I used to reflect how it feels to be a seller at a craft fair!
     And if you can't find a figure/character which quite fits the narrative you have in mind ... then customise one.

    I gave one of my figures a rather smashing set of petal wings to help her out with her climb:
    And if a figure isn't quite working for you, or if it's saying too much or  not conveying the right story ... then cut into it!

    Here I cut off the head:
    ... and reused it on another page:
    I covered over the face as it just felt a bit edgier, a bit more like I'd made the imagery my own, rather than let it say too much of something that wasn't part of my narrative:
    Plus it adds a bit of mystery ... because sometimes you want to keep the full story to yourself!
     
    -----------------------------------------------

    And I'll leave you beneath that veil of mystery for today ... and leave you to ... :
    • Think about how you already incorporate figures into your work [are you a literal story teller? Or do you like to wander into the more metaphorical?]
    • If you haven't tried this style until now have a think about what will you take away from these examples today.
    • Have a look at the Fabulous Figures packs to see if they're something you'd find useful [there's 20% off all orders until Friday night [12th Dec] if you use the code that's stated in my shop description here.]
    • And do join in the conversation with a comment here or on my Facebook page ... I know I've been sharing a lot of collaged characters in these papery pages ... but it's always good to communicate with some real people too!
    I'll be back, when I can, with the second part of this look at filling up those pages. Next time we're going to go a bit abstract!

    See you then then.

    Julie