Hello there.
If you've ever looked at a Junk Journal 'Bits' pack in my vintagey/crafty supply Etsy shop, or if you've ever thought about making your own, but you don't know where to go with it once you've got all the items there in front of you ... then this post - filled with photos from one of my latest projects - is just for you!
By their very nature no two junk journals can ever be the same; the items are usually reclaimed, not mass-produced, plus we decorate them with our own unique photos, words and 'bits' and so ...
I've tried to make this post not merely about just sharing
my project but also
about the general ideas behind each page. That way the design elements should be easy to transfer over into
your personal project, without you needing to have the exact same supplies.
However ... if you would like to begin with the supplies which formed the base of my journal ... then you can pick up the 'Blue Sky & Blackboards' kit here in my shop.
Unlike the other packs I have on sale
this one is
a fully self-contained 'kit' which comes complete with
pre-punched holes in a selection of the pages
plus the book ring to join it all together. Do have a look at the
full - detailed - product description here to get the full picture of what's included ... there's
a lot! [Black and white chequerboard sticky tape anyone?].
Here are a some of the supplies I added to the base kit:
... mainly it's photos, ephemera [receipts, leaflets etc] plus a few vintage book pages, some scraps, and a few splashes of orange [which works so well with the aqua elements of the kit!]
If you're interested in or have bought the kit I'll point out which items are from it as we move along -
LOOK OUT FOR THE **asterisks** AS THEY DENOTE THAT THE ITEM MENTIONED IS PART OF THE KIT.
---------------------------------------------------
My May 2014 as a Junk Journal ...
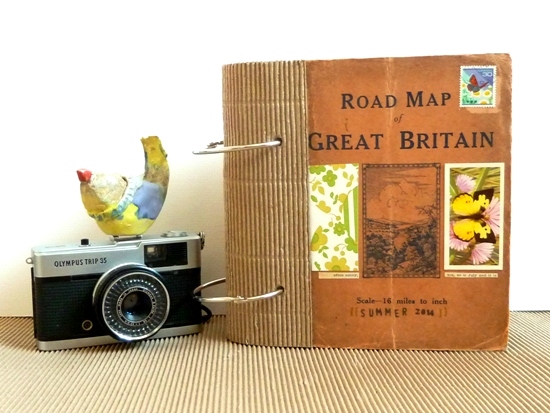
The end result is approximately 17x11cm [just larger than the average 6x4" postcard] and it's a tag style book threaded on to a single book- ring*:
I chose to wrap the finished book with a length of woven banding* on to which I stitched a decorative crochet flower [a gift from a friend] and a button, adding a length of twine to hold it all safely shut.
The covers [above] are made from sturdy cardboard decorated with - but
not hidden behind - number paper*, soft template paper from an old craft magazine* plus some splashes of colour. The overall effect I was aiming for was messy arty collagey scrappiness so there's no straight lines involved and plenty of torn edges.
On the inside cover I began with a
brief introductory page; some typed wording, a chalkboard label* [similar, but not identical designs are in the kit] with cotton tape* that I coloured with spray ink:
The chequerboard sticky tape* and camera fabric* helped to reflect and balance out the colours of the label.
So, now I've set the scene ... let's have a look inside.
While many of my pages feature
photos [see below] - I am a lapsed scrapbooker after all - they're not
by any means an essential part of junk journaling. So, if you don't use photos in your creative work maybe something here will inspire you ...
Examples of photo-free pages:
If there's a
phrase, quote or lyric that reflects the mood you're looking to create, then make
that the sole focus of a page. The other elements can act as a backdrop:
And even
the smallest snippet of info is worth documenting to take you back to a particular place and time ... even without a photo:
 |
| * Scrap of mesh / 'Must Have' label + sticky tape - all from kit |
And if you're not a fan of personal journaling then you can't go wrong with more of
a list style of journaling:
As this list shows, you can continue the 'junk' / reclaimed feel by writing your journaling on something with an existing background design [such as this mathematical paper*] rather than on a personality-free blank sheet!
Other photo-free options include pure collage; which is really just using paper for the love of it! No need to even
attempt to tell a story - not in words at least.
Try expressing yourself with colour and shapes instead!
Sometimes people aren't sure what to do with items of vintage ephemera they have in their stash ... but really ... there's no need to tie yourself up in knots trying to be clever with it ... here I simply used a vintage Lotto board* as
page:
Its lovely muted colours worked perfectly as a base to a little bit of collage; which is simply a line cut
from vintage sheet music and a few scraps in my chosen colour scheme.
Below is a similar idea, only this time using
new ephemera - a leaflet from one of the day trips I'm using the journal to document. Rather than keep it separate, tucked inside an envelope in the album, I simply cut it down and turned it into a page. What better way to give an album a
very specific personalised theme?
 |
| *The 'Love This' chalkboard label and kraft luggage tag are from the kit. |
In contrast ... this item of ephemera - a swing tag from a coat I bought months ago - has nothing to do with the
place we went to:
... but it did strike a note with
me just the same!! I added the punched heart.
Now I've convinced you that
you don't need to use photos ... let me show you how you
can if you want to!
A scrapbooker does Junk Journaling:
If you're used to scrapping on 12x12" then the surroundings may well feel a little different ... a little smaller, more condensed, more
relaxed even ...
... but you can still work with the familiar premise of photo + title + journaling as these pages demonstrate:
To get my photos small enough ...
I make a photo collage [in Picasa, but there are probably lots of other methods] using two images.
I then save it and print it out on to regular 4x6" photo paper. I then simply cut them apart into two photos small enough to use on this size of page!
Sometimes less is more ...
... especially on such a small scale, so I don't always embellish my photos:
And 'embellishments' needn't be 3D ones ... I personally like to use the smallest of scraps in a minimal arrangement:
 |
| *Tag [page base] and patterned paper from the kit. |
I feel it helps me keep a
collage feel even when I'm in
scrapbooking territory! After all you can pretty much blend together any of your favourite techniques in a junk journal ... it's definitely
the place to allow yourself to experiment!!
Another way of adding 'something' to a photo could be to journal over the top of it like I did here after typing on to self-adhesive fabric tape*:
Or ... by typing [or writing / stamping / using rub-ons] directly on to it as I did here [with the title of the sculpture 'Ocean Voices']:
And, of course, it wouldn't be one of my projects if there wasn't a snippet of words in there somewhere!
-------------------------------------
Believe it or not ... there are actually
more pages from this petite journal left for us to chat about! And, as they all share something in common - an element of
interactivity - I'm going to allocate them their own dedicated post in a few days time.
Before then ... I'll be back with other stuff and nonsense ... and
you can check out
the new kit here ... or dig out an existing kit and get journaling!
If there's an idea in this post you'd like to try out please do save / Pin this post for future reference ... and maybe even share it with your crafty friends too! Thanks so much!
Julie :-)
-------------------------------------
* Items labelled with the asterisk are included in the
'Blue Sky & Blackboards' kit available from my Etsy shop.