
This may sound sad to some, but I've just spent my bus journey and walk home in the snow thinking about getting home to a cosy house, a cup of tea and ... some blogging. Seriously, I really do enjoy thinking of things to share here then scurrying off to take the photos and craft the sentences ... and now I've got that off my chest ... I'll get on to the business of my first experimentation with mica tiles.
My Copy+Paste consort Kirsty [Neale] and I occasionally swap with each other a box of random crafty-bits which we no longer want. It's an act based on the combined theories of:
[a] Using what you have / recycling / shopping at home [even if the items come from someone else's home!] and;
[b] someone else's stash is always more interesting than your own and is always worth a good nosey through!
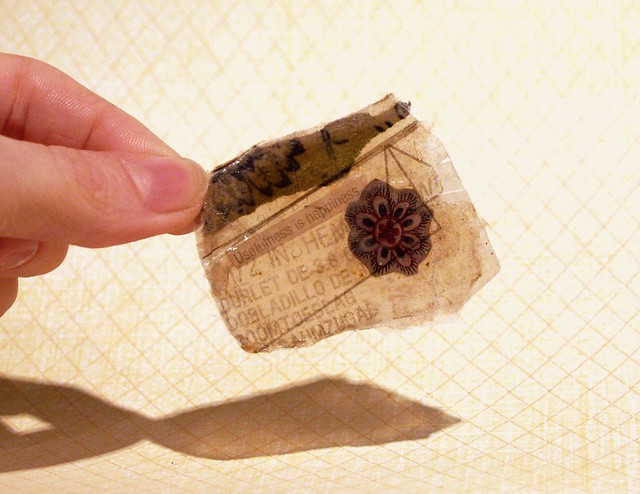
This time, amongst the fabric and paper 'new-to-me' treats in the box, Kirsty had included a packet of 'Mica Tiles' which both intrigued and bamboozled me as I had no idea what they were for.
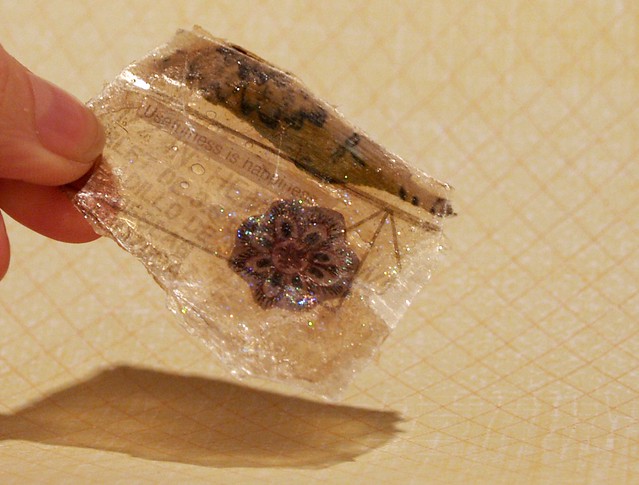
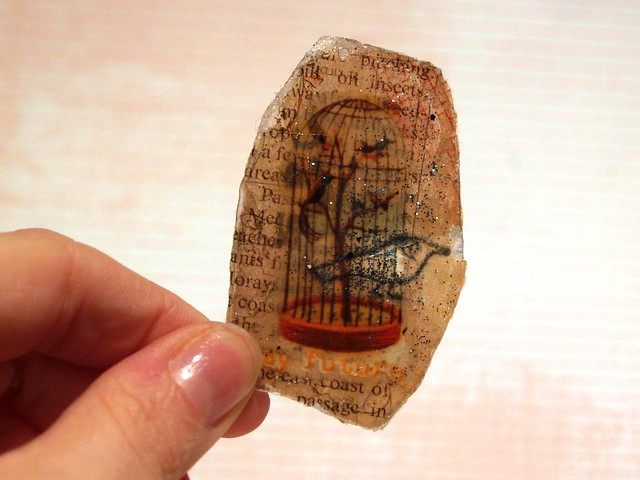
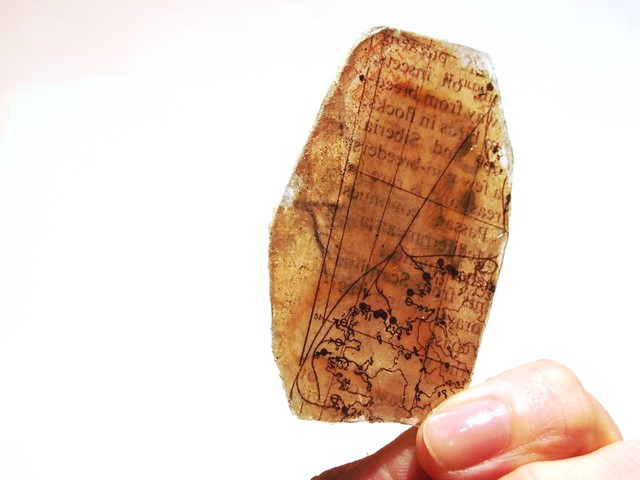
So I asked turned to Mr.Google and enquired as to what on earth one does with a mica tile. Then, after much trawling through things I really didn't want to do with a mica tile [or with anything else for that matter!] I landed upon a lovely project on Sarah Anderson's blog 'The Art of Moodling' [do hop over there to see the inspiration behind my experiments]. And with her method of trapping a collage between the tiles in mind I ended up with this tiny wall hanging fixed to a card for my sister's birthday:
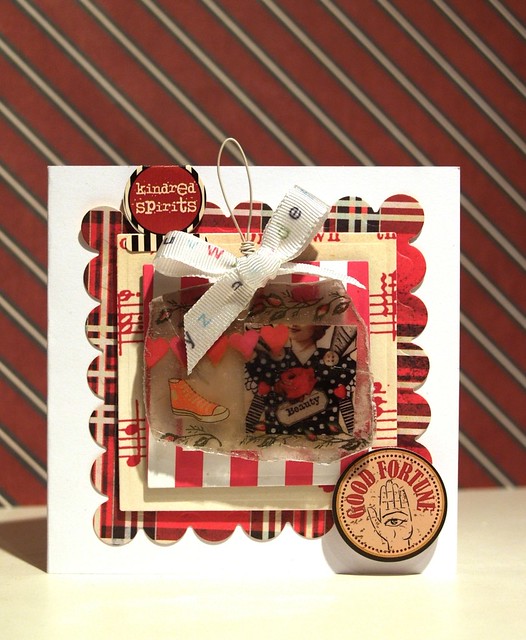
A few hearts and a final layer of gloss were added before pressing another tile ontop of it to seal in the finished collage, amber-like, between the tiles. Once it was dry I punched a hole in the top, gave it a wire hanging loop and temporarily fixed it to the front of a card using 3D foam:

Maybe it's due to, as the saying goes, small being beautiful... but maybe at 5ft 2in I'm somewhat biased on that front ...
Thanks for looking in on me today - if you have any links to other mica projects, throw them this way - I still have most of a packet left.
Julie x


Intriguing! I've never heard of them either. My fingers are too clumsy to do teeny delicate arty things. Love what you've created though.
ReplyDeleteVery nice........ now I know I have some gathering dust somewhere..
ReplyDeleteYou are a very patient experimenter! And that's probably why you get such lovely results.
ReplyDeleteI've have most of a packet of mica somewhere, if this weather keeps up, I'll have plenty of time to experiement with them! Thank you for the inspiration - love the idea of swapping with a friend - bet she's kicking herself that she gave her hoard away now!
ReplyDeleteCan you give more photos of mica tiles because I'm interested on it.
ReplyDeleteOoooh, I've seen these for sale on QVC and was v. intrigued by them. You can pull them apart and get lots of layers of thin tile from the one piece. I love what you have created with it - you are always full of inspiring ideas Julie!
ReplyDeleteJak :-)
I've been wanting to create with these......now I feel inspired! thank you :)
ReplyDelete