Sunday, 9 November 2014

Memory keeping: 'Fake christmas' the story behind the layout

 
Hello there.
 
I'm taking part in the 'Frosty Festivities' blog event hosted at Jennifer Grace Creates today so, if you've hopped over to here from there, then welcome, welcome!
 
  1. Jennifer is a long time supporter of my blog and Etsy shop ... and in a vast virtual world familiar faces and friendly connections are worth looking after! And ...
  2. Despite it being a frosty themed event ... she hasn't tried to get me to dress up as, or sing like, any character from Frozen. So how could I refuse?
For more of the craft-related details on my layout ... 
... then do drop by my post at Jennifer's place.

But I thought that here I'd share more of the story which the page is based around: the story of 'Fake Christmas'.

Funnily enough I've already had 2 'fake' Christmases so far this year:
  1. when I worked on festive magazine projects in June, July and August, and ...
  2. then when my friends and I had a Christmas-themed crafting weekend in the countryside in October.
And yet this page documents neither of those because there are even more fake Christmasses in my life, in fact, this one in particular is becoming something of a tradition ...

So here's the full story of the 'real' Fake Christmas ...  [complete with typos and mistakes. Apparently there's no 'Delete' on a typewriter keyboard ... who knew?]
I'll write it out here too - in case you can't view the photos:

*FAKE CHRISTMAS: THE RULES & CUSTOMS*

Fake Christmas is held each year at some point in between real Christmas and New Year. It's hosted by Janet who doesn't seem to mind ... or maybe she just doesn't know how to keep us out. (Unless that's what her dodgy doorbell is all about ...)

There's tea, chocolate and cake involved and sometimes we take crafty things and act like it's not all about the cake and presents. But mainly it's all about the cake and presents. Speaking of which ... when it's time to open presents this has its own strict code which must be adhered to:

1. Only one person may unwrap a gift at any one time.
2. Then the person next to them takes their turn.
3. If gifts are wrapped individually, only 1 gift may be opened per turn. [I think I've actually got this wrong ... but, like I say ... no 'Delete' on a typewriter! And no way was I going to type it all out again!!!]
4. This continues until all the gifts are opened.
5. There will then be an assessment of which scraps of wrapping paper, which tags, which ribbons, twine etc. must be salvaged by one or other of the group.
6. Any interesting tags and cards will be analysed for creative ingenuity and filed away for 'future reference' (i.e. to copy later).
7. There may, at any given point, be a zebra making an appearance. Or a sheep, bird etc. Whatever your chosen 'thing' is. We're on part friendship group and one part menagerie.
8. If there's anything that will even vaguely fit on you head, it should be put on your head. (Although, to be fair, this custom is not just for Christmas).

With all this in mind I'd like to wish you a very merry - fake - Christmas and a Happy New Year! (That's just called 'New Year'. We don't have a special name for that. Yet ...
So, there you have it, if you've been thinking about setting up your own Fake Christmas for some time now but haven't known how to go about it ... well, now you do.

Feel free to use our rules and customs to create your own opportunity to milk the festive season - and your friends - for all they're worth [but leave out the zebras. They're mine.] 

-----------------------------------------

Don't forget to hop over to Jennifer Grace Creates to catch up with all the other 'Frosty Festivities' and my post ...

... and I'll see you back here soon. [We're altering a book next week don't forget!]

Julie :-)

Friday, 7 November 2014

Variations on a *theme*: introducing a focus to your collage adventure. 'Fortune & Geese Favour the Bold' Part 2

 Hello again.

In the first post in this series I shared a list of some of the practical supplies you might need if, like I've done, you were planning to alter an old book and fill its pages with collages. Now today I'd like to add to that by suggesting there's something else you might also need to find before you begin; only this time it's not something as concrete as those items on the list ...
http://www.pinterest.com/notesonpaper/altered-book-adventure-fortune-geese-favour-the-bo/
This supply might take a little more pondering, a little more philosophical musing, a little more creative energy than it took to reach out for the glue-stick or scissors. But I would argue that this element is going to be just as useful to your project in the long run:

**You're going to need a theme... and a purpose.**

The PURPOSE...
  • This aspect of the project is all in your mind!
  • It's is the thing that's going to persuade you to get out those supplies, to make the effort, to see the project through.
  • It'll be what will keep at bay the guilt of "why am I sitting here cutting up paper when there's an ironing pile in danger of creating a landslide in the corner?"
  • It's the thing that can give a shape to how you think about the project.
  • For example "I'm making this to ... have a beautiful place to use up my favourite supplies" / "I'm making this to ... document this time in my life" / "I'm making this to ... store all my favourite song lyrics" etc etc - whatever it is that means something to you right now.
  • My own purpose was to create a book to be home to 30 collages documenting my Learn Something New Everyday lessons during September 2014. This was ideal for me as it had both a clear purpose ... and a clear end date [it helps to know the project is going to be completed!]. 
Naturally, like any of the creative tips I offer here, this one's born from my own experience. It's what works for me when I set out to make a very focussed project such as this one. But I'm well aware that this style of working may not work for you. And that's fine! It's not a deal breaker. We can still be friends.

In fact, I only tend to apply such clear boundaries when I 'm working on such a narrow project like this one. It's not how I approach my general messy art-journal and collage fun, the stuff I dip in and out of whenever the mood strikes.

And maybe if you're just going to try out making an altered book, or a collage, for the first time, you might prefer to have no expectations and simply play and experiment at first. But equally ... a bit of structure and purpose might help there too!

And so ...

 The THEME ...
  • This is what will inform the style of papers you choose, your colour-scheme, your imagery etc
  • It's what will help to narrow down your choices from all the papers in the world!  
  • It can be linked to your purpose ... eg. if you're making a book about travel then your papers / ephemera might be travel themed too / maps / tickets etc.
  • Or  .. it might have nothing whatsoever to with your purpose ... it can just be a colour-scheme you choose, a set of papers you want to work with, a method you want to try out.
Does that make sense? The 'purpose' is kind of the 'why bother making this?' ... while the 'theme' is kind of the 'what am I going to make it with? / how am I going to get these ideas out of my head and onto a page?'

** BTW: if you need any help sourcing imagery or text to fit your chosen theme - drop me a line either by email [link in sidebar] or via an Etsy convo - and together we can curate a bespoke pack of Plundered Pages and/or Ephemera bits to suit! [Whatever the theme is ... I like a challenge ... ]

OK, enough explanations ... let me illustrate. My purpose was to create a cohesive book in which to keep my daily lessons meanwhile my theme was inspired by the Wes Anderson film 'The Grand Budapest Hotel'.

Why? Well initially it was because my base book was bright red with gilded lettering ...
... and while the size was ideal, and the pages were nice and thick, the colours and style of the book were not at all the ones I automatically think of when starting a project. Until ...

... until I remembered how much I loved the look of 'The Grand Budapest Hotel' which features the same gold and lipstick red that I was struggling with but in a most perfectly striking combination with icing sugar pinks, Imperial purple and snowy white:
[BTW: it's an absolute delight of a film too ... even if you don't want to mine it for artistic inspiration!]

And suddenly, by 'borrowing' from Anderson's greatness I had myself a colour-palette to work from!
And, believe it or not, rather than making extra work for yourself finding things to match ...

... selecting supplies with a clear theme and/or colour-palette from the start can actually save you time later on:
  • Once you have a particular colour combination in mind you can sift and sort through your collection of pages and decorative papers looking purely for colours that matched and even images that fit in.
  • You give yourself a clear guide on what to select and - equally importantly - what to leave out.
  • It removes all the pressure of decision making / paper shuffling that can slow a project down.
  • It releases you from the tyranny of choice! Too much freedom can be harder to deal with than too many restrictions!
  • When you get stuck for what to do, or are tempted to just stop, having some clear parameters in place means you can turn to them for inspiration. [You just make another page using the same colours / imagery / theme ... and your creativity gets flowing again.]
Here's how it worked for me:
  • In basing my scheme on The Grand Budapest Hotel I collected together papers in shades of purple, pink, white, red and neutral.  
  • I painted my pages with a base layer of acrylic paint in various shades of 'icing sugar' pink and cream.
  • I also used envelopes [to store my hidden journaling] in matching shades.
My pages from Day 1 demonstrates this perfectly:
Here I combined all the colours of the palette while illustrating my lesson for that day which was 'A Run Can Be Lovely'. [Who knew? But that's the word that came into my head after a morning run. It was a short run ... hence feeling 'lovely' and not 'close to passing out'].

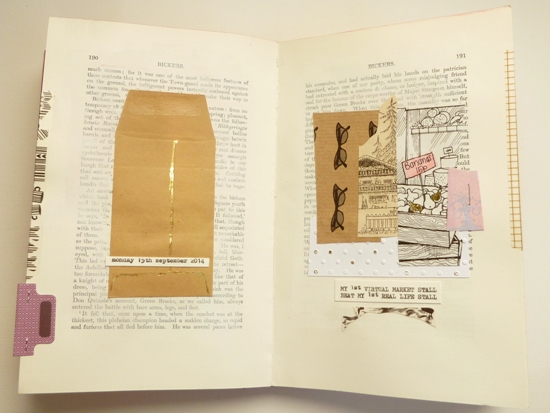
As well as taking inspiration from the colours of the film I was also drawn to using imagery of impressive buildings too as seen here on Day 3:
That's a very Grand Budapest style building isn't it? How could I not use it?! 

The lesson from this page notes that: 'There are people who will sell you a rainbow' after I passed an Estate Agent's window and noticed they were selling one house using a photo - not of the house itself - but of the view from its windows: the view of a beautiful rainbow over the beach!! As if the rainbow was part of the deal!
Day 5 saw more imposing buildings and more candy pink:
 
While Day 15 borrows dusty whites and pale pink [with a mountainside chalet thrown in!]:
But despite being guided by a large over-arching scheme ... I did manage to make my pages personal and relevant to each day's lesson too as this one all about my Facebook page sale illustrates:
And my final example for today is another which gives a nod to the soft pastel shades and vintage European style of the film:
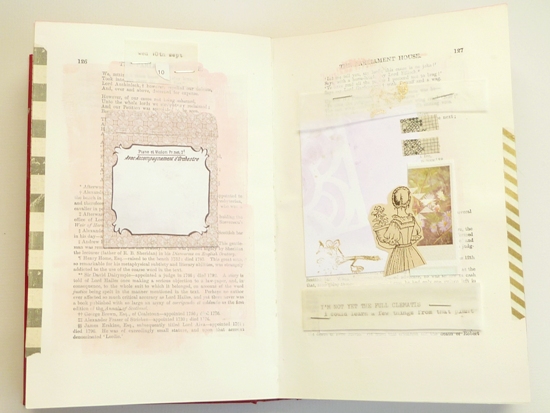
Day 10 'I'm not quite the full clematis':
That day I'd been inspired by the tenacity of the plant as I tried to prune it.

Now then ... I'm not trying to suggest that anyone who didn't know that I'd based my book on the Grand Budapest scheme could have guessed at the fact simply by looking at the finished pieces ... but that wasn't the point.

Having my theme / colour-scheme:
  • set me up at the start
  • helped me select my supplies
  • inspired my page designs
  • and kept me on track while I made 30 of them!
And it's given the finished book a nicely cohesive style too with each page remaining individual yet contributing to a harmonious whole.

So, once you've collected together those practical supplies take a little time to pull together the creative essentials too.
  • decide your purpose for making the book ['to enjoy the process' / 'to cut up nice paper' is reason enough!]
  • then set about curating your supplies based around a theme or colour-scheme
... and see where it leads you. Remember the mantra of this series ... fortune, and geese, favour the bold!

[For the record: I've got no idea if geese actually do appreciate your inner confidence; it would be nice to think they do appreciate creative boldness... but let's not take any chances people. I won't be held responsible ... ].

-----------------------------------------------------

What to do once you've chosen your supplies:

  • Keep them all together in a bag or box of their own. 
  • Then, each time you come to work on the project, you know you're only going to be using what's inside.
  • This cuts down on your pondering and new supply-seeking time ... which can totally distract you from simply getting on with the 'doing'! [Ask me how I know ...]
  • A simple thing like restricting your supplies to those you set out at the start both gives you more time to create but also more focus on using them creatively.
[For lots more examples / tips on how to organise yourself for a self-contained project, similar to this one, then visit this 'behind-the-scenes post of mine].

And to keep track of all the posts in the 'Fortune & Geese Favour the Bold' series then you can follow [or simply visit] the Pinterest board I've made for the series here.

-----------------------------------------------------
 
In the next post of the series we'll start the making part and you can start getting your hands dirty / painty / gluey. We'll be dismantling/altering that book to make a home for all those scrappy collages but, before then ...

... you need to find a purpose, a theme/colour-scheme and a bag to throw them all into! So I'll leave you to it.

See you soon.

Julie :-)

Tuesday, 4 November 2014

Supplies list + prep notes for an altered book + collage adventure: 'Fortune & Geese Favour the Bold' Part 1

Hello you.

As I mentioned in last week's sneak peek over the coming weeks I'm going to share my latest collage / mixed-media / altered book project here and I decided that - rather than simply share my photos of the end results - I'd try to offer something a bit more useful.

EDITED: Here's a link to the complete series.
  • Part 1: Prep notes and supplies list
  • Part 2: Introducing a themed focus into your altered book / journal
  • Part 3: Turning an old book into a new home for your collage
  • Part 4: 101 alternative crafty supplies ... and where to find them
  • Part 5: Using figures to create a narrative in your collage
  • Part 6: Experimenting with Abstract collage (while playing with your favourite papers)
  • Part 7: [you are here!] Adding words to your pages.
  • Part 8: Adding the Midas touch: Ideas and inspiration for using gilding flakes and foil.

  • Ideally I'd like you to feel you could follow along with the project picking up whatever it is you fancy while making it your own.
    I'm calling it an 'adventure' because it's not exactly going to be a traditional full blown 'class' or 'workshop' as such ... but it is going to be a series of:
    • tutorials / 'How To's
    • information posts and ponderings
    • practical tips
    • and lots of photos ...
    ... all based around the topics of ...
    • altering a book to use as a journal
    • the style of collage I used inside
    • the kinds of supplies you might use to make something similar
    • ways to add additional details
    • and more!
    And I hope that, somewhere amongst all that there'll be something to inspire you to pick n' mix from the information and see where it takes you.
    • maybe you'd like some general arty/collagey inspiration and ideas [there'll be plenty of that as I share each page]
    • maybe you'd like some practical tips [I'll be explaining my process as we go along]
    • or maybe you'd be happy to hear some confidence boosting positive encouragement so you feel like you could start something similar or try out a new style or technique [there'll be lots of that ... I've got your back, creatively speaking. In fact I'll dust off my crafty cheerleading pompoms ASAP].
    And if you've never altered a book before now don't let a small fact like that that prevent you from joining in ... 
    ... until I worked on this project I'd never altered a book before either.

    Well ... I had altered one or two in so far as cutting them up and using their pages and covers for other things ... but I'd never actually created an 'altered book' from one! But now I have ... and you're welcome to take the plunge with me.

    Let me tell you a little bit about my own project first before I move on to a suggested checklist of supplies you may need if you're planning to follow along.

    The reason behind the project in the first place was to have somewhere to house my daily 'lessons' from joining in with the idea of 'Learn Something New Everyday' [a class hosted annually at shimelle.com]. It was my 4th year taking part and I was looking for a new method of recording my thoughts ... which is when the idea of collaging the pages of an old book popped into my head.

    So ... if you too feel a concrete reason / a specific focus to get you to pick up a new project ... then start thinking of one now! It could be to document something specific, [we've got Christmas coming ... maybe it could be related to that??] or to explore a themed series of pages ... it's up to you!

    And, while you're at it, here are some other practicalities to take a note of ...

    What You'll Need**: [practically, creatively ... and maybe even philosophically ...]

    **This list contains the things I used ... you can adapt and omit any of it to suit your self and your style. Just use it as a guide if you want to prepare a kit for yourself before you begin.

    A book to alter:
    • If you haven't got one on the shelf already, nip out to your nearest charity shop and have a look there. [Trust me, you'll feel better cutting into a book when you balance it with donating to charity!]
    • Ideally it would be: hardback, something you're not going to get too attached to and refuse to dismantle, something that isn't a relic and nothing especially beautiful!  
    • It should have: decent weight pages to make sturdy bases for your collage. However, you can always stick several thinner pages together, so don't worry if you can't find heavy paper. 
    • In fact something like one of those ubiquitous Reader's Digest compilations would be ideal.
    This is the tome I converted:
    I chose this one because:
    • the colours matched my theme exactly [more on this in the next post]
    • it was the 4th year I'd created something for Learn Something New Everyday so I thought it was going to be an appropriate part of a tradition of my own! 
    • the pages are quite thick
    • the subject matter was innocuous and I didn't need to worry about what kinds of words or phrases would be poking out behind my collage! [The same can't be said for another book on my shelf which I later discovered was part of an obscenity trial in the 1950s!! So, I'm just saying: choose your book carefully ...]

    A ruler:
    • Not to do anything as drastic as measuring with [why would I want to inflict anything as accurate as that on myself?]
    • No ... it's just to use as a straight edge when tearing out the unwanted pages of the book. [I'll explain more on this when we get to the destructive ripping and tearing stage!].
    A colour scheme and / or an overarching theme:
    As I mentioned above, I'm going to chat more about the whys and wherefores of this aspect in its own post, as the next instalment of the series. 

    For me this aspect comes under the category of 'philosophical' things you might need for the project ... and while I believe you'll find it useful ... you may disagree. But, I'm going to fight its corner for now!

    And, while we're on the topic of 'themes' here's the page from which the name of this series came from ...
    Maybe I'll explain it to you properly sometime ... or maybe that'll just spoil the mystery ...

    Adhesives:
    • A wet glue: I used a matte finish glaze medium [by Daler Rowney] because I like how it isn't overly tacky [when I inevitably get my fingers all 'clarty' with it!]. Plus, as it's matte, when it dries on top of the paper it doesn't leave a shine.
    • However, if you're not clarty-prone, or you don't mind shine, then PVA or any other paper glue would work just as well.
    • A glue stick - to stick your pages together [quicker and easier than spreading glue / cheaper than double-sided tape].
    • I also used staples to hold some of my elements in place. But that's purely because I like staples! They're not an integral part of the project. [Unless you too are addicted to office supplies].
    Collage materials / paper supplies:
    Packs of lucky-dip 'Collage Scraps' are now on sale in my Etsy shop and are made up from a broad range of off-cuts from both this particular project plus lots of other bits and pieces I've made. They're just £2.50 and would make a fun inspiration kick-start to any scrappy style project.

    Alternatively ... you can prepare by collecting together a variety of papers which inspire you ...
    • Things such as old book pages, music paper [all of which I can also help out with in my shop if you don't want to go trawling junk shops! OK ... end of hard sell ...]
    • Handmade papers, patterned papers
    • Hand painted papers
    • I feel I've been saying 'papers' a lot
    • Papers papers papers
    • A selection of pictures / figures / images [and yes, they're also papers ...]
    If you need a little help to work out where you can source some unusual / affordable papery items to use [rather than reaching directly for the new pre-packed patterned papers - as lovely as they are!] then hold on for a post later in the series where I'll be listing 100 places to find / types of supplies you could use in collage.

    [Well ... when I say 100 ... that seemed like a good number to aim for ... whether I'll reach it or not is yet to be determined!! Try not to think less of me if I only make it to 50 ...].

    Finishing touches
    • If you plan to add wording to your pages, you might want to think of how you'll do this; I typed mine but you could print it out, hand write, stamp, cut words from pages.
    • Also .. if you plan to add additional but HIDDEN journaling to your pages, you'll need some small envelopes/pouches too [I have a selection of those here and will happily take custom orders].
    • I gilded areas of some of my pages using a couple of methods including a Write N Rub pen and Tonertex foil. But, seriously ... that's not an essential! Just a fun added extra.
    • And, finally, I edged my finished pages with strips of washi tape.
    ----------------------------------------------------------------

    How does that all sound? There's nothing too extravagant [blingy gilding aside!] to hunt down is there?? And hopefully you'll be able to set some of that aside ready and waiting for the adventure to begin. And, as all successful adventures and expeditions begin with packing a kit ...

    **I suggest you put all your supplies together in a bag or box with a pair of scissors so that, whenever you're ready to snip and stick ... everything will be right there on hand.**

    OK, I'll leave you to sort out what you need and I'll be back soon with that look at why choosing to work to a theme can help you from the very start ... and right throughout the project.

    Any questions, suggestions or nice things to say ... then do drop me a comment. I really appreciate the feedback and support!

    Julie x

    Saturday, 1 November 2014

    My Month in Numbers 2014: October


    Hi and Happy November to you!

    [Do people say that? Well, I've said it now ... can't take it back ...]. So as a new month begins it's time to summarise the old one ... in numbers.

    And if you're going to write about notable numbers you can't beat a record-breaker for a good place to start ...

    31st October in the UK = the warmest Halloween on record!
    Apparently it was 23.6C in London and while I doubt it was quite that here, it was certainly a balmy day and evening. We walked home from a party at 23.15 and even at that time it was still too warm to be wrapped up in the winter coat I'd dressed in! 

    30 mins = the duration of my 2nd sports massage. This one left me not only completely exhausted ... but also pretty bruised. My back had 1 large plus several smaller bruises which all left me wondering: how am I meant to judge the success of the massage process?

    I don't seem to be getting as many aches and pains as I used to ... but am I meant to weigh the bruises against that?! Is it a case of things getting worse before they get better? Or being cruel to be kind? Or do I have to learn to embrace my inner masochist?? Who knows??!!! I need to get my head around it before booking myself in for a 3rd session ...

    5 [at least] = number of times my campus work timetable changed. I'm working 2 days a week there this term and it took at least 3 weeks for everything to finalise, and we'll just get used to that pattern of working ... before it changes again in February!

    But enough about work ... let's move on to some play ...

    15 = the number of crafters who attended at crop which was another record number.
    In fact, there were so many of us there that [a] we could hardly see the people at the other end of the room and [b] we very nearly had too many to fit in! Oh the perils of popularity ... we're really not accustomed to it!

    And, as if we hadn't had enough of each other from being trapped in that room crafting together at crop ...

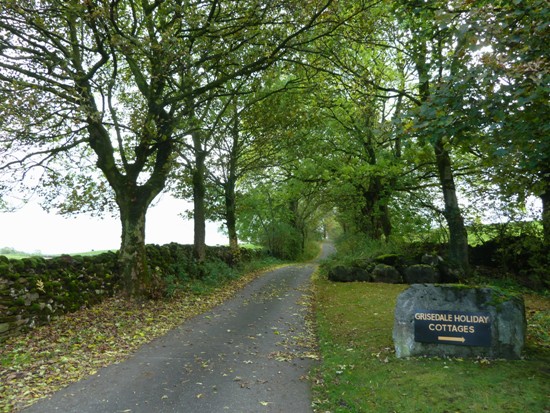
    October marked the 2nd time my friends and I have stayed here together:
    The holiday cottage we stayed in is a converted barn, on a working farm [for the record, cows seem to start making their presence known at around 7.30am in October. Moooooooo.] in the Yorkshire Dales National Park:
    [BTW: I didn't know my post-craft-shop-shopping, fresh air-seeking, dale-gazing was being photographed until this photo appeared on Facebook. Thank you Andrea - you can take over James's role as my official paparazzo!].

    And while this was only the 2nd time we'd stayed in that particular place ...

    11 = the number of times, over all, I've been on one of our 'crafting in the country' weekends!
    • This time around there were 9 of us, who arrived in 6 different vehicles.
    • I took 3 bags with me [1 for clothes, 1 for crafty stuff, 1 to stop my tool tote from tipping out in the car!] plus 1 trolley full of crafty supplies.
    • And I came back with 1 small bag of fresh supplies from visiting Samuel Taylor's craft shop which was a mere 15 minutes away from our cottage. I know! It's almost as if we plan our trips so we were never too far from a craft shop ... but who would do a thing like that? Who? ....
    We tend to have a theme to our weekends and this time it was Christmas ...
    67 = the number of days early we ate Christmas lunch.
    Here it is complete with the regulation number of sprouts:
    Hannah counted up the number of sprouts in the bags to ensure everyone had a fair share!

    Thanks to Jean lunch with all the trimmings was delicious, and thanks to Jackie so was the homemade Christmas pud:
    But, thanks to health and safety rules meaning the cottage didn't having any matches on site, and thanks to none of us having a lighter with us ... Gail didn't get the chance to douse the pud in brandy and set it alight! [Which, in our circle, is her duty whenever there's a Christmas pud involved; seemingly we have official sprout counters and pudding lighters in our friendship group!]

    After lunch these numbers became rather important:
    5 things for £5 = the rules for our early Christmas gift-giving. We each brought with us 5 items we'd found, spending no more than £5, then we decided who got which by picking out a raffle ticket.

    And finally ... while we're on the subject of receiving parcels you know nothing about ...
     
     285 = the number of vintage postcards I received in a not-especially-well described job lot I bought:
    Rather enigmatically the product description read "do not know anything about these but there are a lot! many used through the post". And, as they were a bit of a bargain [if you love old paper like I do!] I decided I didn't care what they were ... I wanted to be surprised [you know I'm a sucker for serendipity!].

    They turned out to be a collection of all kinds of odd postcards, some used, some blank, some in English, many in German. With postmarks dating from between 1947 [for the German postcards] up to 1981 for a pile of cards sent to an outdoor sports retailer in Tuscaloosa USA by people requesting, amongst other things, kayaking catalogues!  Remind me to share some with you here sometime - they're a fascinatingly random bunch!

    ------------------------------------

    And so ... those were my numbers, you can join me with yours if you fancy it.

    The number of people joining in has tailed off somewhat this year, but that's fine! I've struggled this last 2 months to get my own vital statistics blogged ... so I know how it is.

    But, it's like I always say, you're welcome to dip in and out of the numerical pool whenever you feel like it; whenever you find it fun or useful. I'll still be here sharing mine and visiting the other counter-uppers each month.

    At the end of this year - after 2 more Month in Numbers posts - I'll have been memory-keeping-by-numbers for 5 whole years!!!!! So I've no plans to stop counting before my half decade anniversary.

    Wishing you a happy, healthy, month filled with things you just might feel like counting up and sharing this time next month.

    Julie x

    Monday, 27 October 2014

    An 'altered' book and scrappy collage adventure: sneak peek

     
    Hello hello.
     
    So ... I keep talking about the altered book I started back in September don't I? And I keep telling you I'm going to share it here soon. And over on my Facebook page I've even mentioned that rather than being a simple 'here's my finished work' approach, my draft posts on the subject have now actually morphed into something of a mini workshop!!
     
    A free workshop that is. Here, on my blog, where you can follow along in 'real time' or simply pin / make a note to dip back into at any time in the future.
     
    A workshop filled with practical tips to construct an altered book alongside wider collage inspiration plus encouragement for anyone who might like to try something similar.
     
    The main trouble I'm having in preparing the posts is [a] finding a good stretch of time to take all the photos necessary - there's lots!! and [b] finding a good stretch of time to take the necessary photos in photo-friendly daylight!!  I really do want to get some good shots of the finished pages or else there's not much point me sharing them.
     
    And so ... as I keep promising all this without providing evidence that I have actually made this project; I felt it was about time I shared with you some creative proof-of-life! So here's one of my favourite pages from the whole project ... to give you a flavour of the style of work I'll be demonstrating in the workshop::
     So ... if relaxed, slightly abstract, scrappy paper collage is something you'd enjoy experimenting with ... then it'll be a treat to have you on board!
     
    I'm thinking of calling the series 'Fortune & Geese Favour the Bold' for reasons which may[ or may not] become clearer as I share my pages. Either way ... I like the title and, if you're  feeling a little uncertain about trying a new style or technique I think it's good to be reminded that your efforts will be favoured by fortune ... and geese ...
     
    Anyway ... here's all you need to know about:
     
    'Fortune & Geese Favour the Bold: An 'altered' book and collage adventure with Julie Kirk: 
    • It's a free workshop via a series of blog posts here on my blog;
    • There be lots of photos  ... just as soon as I get a good photo-taking day! I'll use the images to explain and explore the approach I took to collage in this project as well as the construction of the book they're housed in;
    • You're welcome to create along with the posts, or simply save up the ideas for a later date;
    • You won't need any particularly specialist materials. The majority of the project consists of  paper and glue. Everything else is optional.
    • I'll be issuing a full supplies list and class preparation notes here before the start of the series;
    • There'll be a new range of small collage scrap packs available through my Etsy shop during [and after] the workshop for anyone wanting a fresh boost to their own supplies.
    • Oh and, the workshop will be free ... or have I already mentioned that?
    So, if you can picture yourself curled up on an Autumn night [or any night for that matter!] with a bag of paper scraps on your lap, a book to stick them in and an attitude of 'let's just see where this papery adventure leads me' ... then this is for you.
     
    May the geese favour you my crafty friend!
     
    Julie x
     
    p.s: I'm avoiding saying exactly when the series will start as I'm a bit deadlined-up all this week ... so don't want to make any promises I can't keep! But expect the prep-notes to land in the next week. Probably.